Illustration
There are two common setups of the camera:
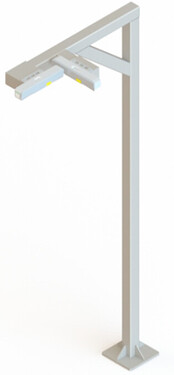
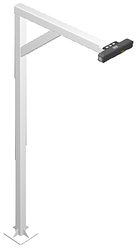
- Fixed installation (eye to hand), as shown in the following figure:
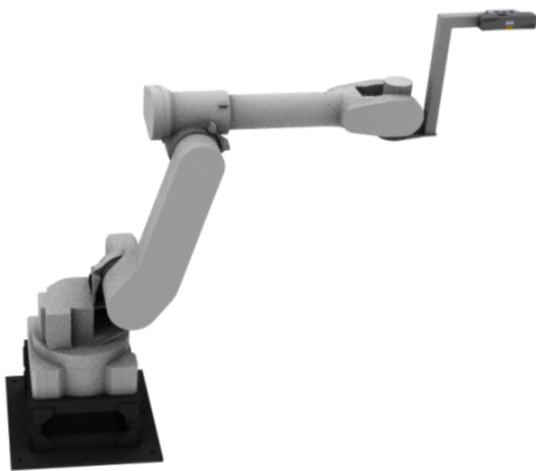
- Arm-mounted installation (eye in hand), as shown in the following figure:
Comparison
| Setup | Features | Advantages |
|---|---|---|
| Fixed installation (Eye to hand) | The camera is fixed on the camera bracket. | 1. Can achieve a larger field of view. 2. The robot does not need to wait for the camera to capture images during task execution, improving production efficiency and cycle speed. |
| Arm-mounted installation (Eye in hand) | The camera is mounted on a gripper (end effector) and moves with the robot. | 1. Can capture images from multiple angles/positions: After mounting the camera on the robot arm and precisely moving and positioning with the robot arm, the camera can capture images from multiple angles and positions. 2. Adapts to incoming materials of different heights: The robot adjusts the camera’s image capturing position by lifting it to accommodate incoming materials of different heights. |
Note
Depalletizing projects
- Considering that some pallets on-site are rectangular, we recommend to choose the fixed installation (eye to hand) for depalletizing projects. When using the eye-to-hand setup, the long side of the camera’s field of view should correspond to the long side of the pallet, and the camera should be positioned above the center of the pallet.
Shaft picking projects
-
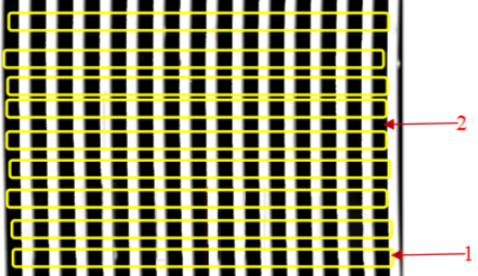
To improve the point cloud quality of reflective shafts, when installing the cameras, it is recommended to align the projected structured light emitted by the camera perpendicular to the arrangement direction of the workpieces (as shown in the figure: 1. Workpiece, 2. Structured light).
-
The incoming workpieces can be arranged in two ways: east-west arranged and north-south arranged. To enhance the point cloud quality of the workpieces, dual cameras can be set up. The specific installation method can be referred to in the figure below.